Imagine the worst. Losing irreplaceable photos because your Mac’s drive failed? Accidentally deleting your dissertation? You might think it will never happen to you, but all it takes is a glass of water falling onto your MacBook and you could lose everything.
But at least if you’ve got a backup, the financial outlay of getting a new Mac will be made less traumatic by the fact that you can recover everything from your old one. Luckily Apple makes backing up your Mac really easy, so there really is no excuse not to do it.
We have lots of general advice about the importance of backing up your Mac in a separate article, but in this article we’re going to focus on one method in particular: Time Machine.
Other apps can back up a Mac: take a look at our recommendations of the best apps to back up a Mac, which include our top choices: ChronoSync, Carbon Copy Cloner, and SuperDuper!, but Time Machine is free and super easy to use, if you know how.
This tutorial covers everything you need to know about backing up your Mac using Apple’s Time Machine software, including: how to use Time Machine, what to do if Time Machine is too slow, what Time Machine does and doesn’t back up, what to do if your back up fails due to not enough space, and how to delete old backups. We’ll also cover how to back up multiple Macs using Time Machine.
What is Time Machine?
Time Machine is the backup software that comes for free with every Mac. All you need is a separate storage device to back up to.
Time Machine is a simple, automated backup system that, when an external drive is connected to a Mac, will recognise that drive, ask if you intended to use it as a Time Machine drive, format it, and begin the task of steadily archiving data to it via hourly, daily, and weekly snapshots.

Backups can be hourly, daily or weekly.
Foundry
There aren’t any bells or whistles or overly complicated configuration elements to contend with, and while the first backup slogs through the arduous task of backing up every file on your Mac, sequential backups are fast as they include only recent files.
Outside of the occasional error in which you might have to redesignate an external hard drive as your backup drive or clean out older backups to clear out space, Time Machine is phenomenal at its job, to say nothing as to how easy it is to restore a backup file or folder as needed.
In short, Time Machine made my tech clients’ requirement of “I just want something that automatically backs everything up in the background” easy to fulfil, and Apple making this a free solution makes the solution even better.
What does Time Machine do?
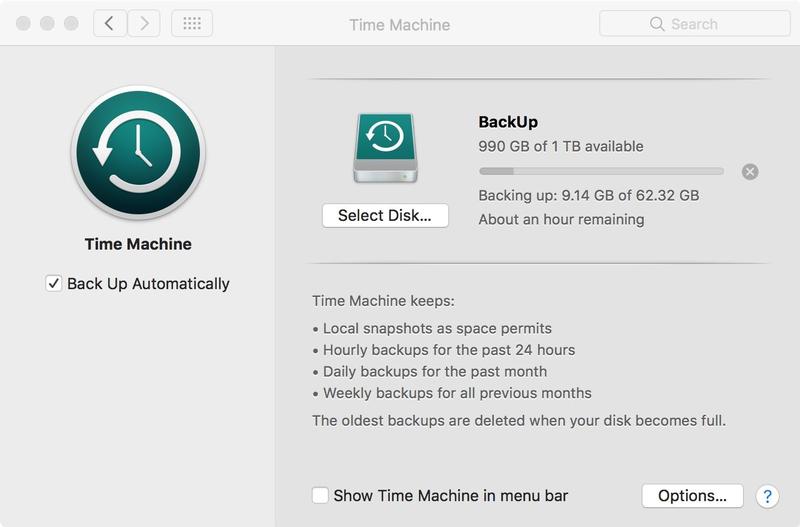
Time Machine keeps a copy of everything on your Mac. It makes hourly backups for the past 24 hours, daily backups for the past month, and weekly backups for each month. It also creates local snapshots on your Mac. One daily snapshot is saved every 24 hours, beginning from the time you start or restart your computer. One weekly snapshot is saved every week.
This probably sounds like a lot of backing up, but it isn’t. Time Machine only backs up the changes you have made since the last backup so each backup should be really quick.
That doesn’t mean that the new changes overwrite all the old changes. Time Machine stores multiple versions of everything you are working on. For example, you can see a document as it was when you were working on it last Wednesday, as well as the version from Thursday.
It is also really easy to locate the older versions of a file–which is handy if you have changed your mind about changes that were made a few days ago. When you look through your Time Machine back up everything is organized in exactly the same way as it was in the past.
So, for example, if you had a file on your Desktop before you accidentally deleted it last Thursday you can go to the Desktop folder as it was last Wednesday to recover the file.
You can wind back to the last time you updated the document.
Foundry
The other benefit is that because Time Machine isn’t backing up your whole Mac every time, it shouldn’t take up a lot of space on your backup drive. But when you do get to that point the older backups will be deleted to make space for new ones.
One other benefit of using Time Machine is that if you get a new Mac you can use your Time Machine backup to ‘recover’ your old Mac onto your new Mac. All your settings and all your files and folders will be just as you left them. We’ll cover how to recover your Mac using your Time Machine backup, and how to copy your Time Machine backup to a new Mac, below.
How to use Time Machine to back up your Mac
What you need: You’ll need a reasonably large external storage device. This could be a USB, Firewire or Thunderbolt hard drive or SSD that you plug into your Mac, or a NAS drive which your Mac connects to via a WiFi network. We’d advise getting a unit offering at least 1TB if you can afford it. We have a collection of the best NAS drives, the best hard drives and the best SSDs, to help you find the best option for backing up to.
- Plug in your hard drive or SSD. You may see an alert on your Mac asking if you want to use the drive with Time Machine. Click Use as Backup Disk.
- If you’re not prompted, navigate to System Settings > General > Time Machine, click Add Backup Disk, choose your device, and enable Encrypt backups if you want to add encrypt to your data for security. (You will need to create a password, you can set up a password hint.)
- Time Machine will reformat the drive (if needed), then start the first full backup. This first backup can take several hours.
- Enable Show Time Machine in the menu bar for quick access and to force manual backups via Back Up Now.
Your drive will need to be formatted to either the APFS or Mac OS Extended (Journaled) format. For help formatting your drive open Disk Utility and follow our How to format a drive guide.
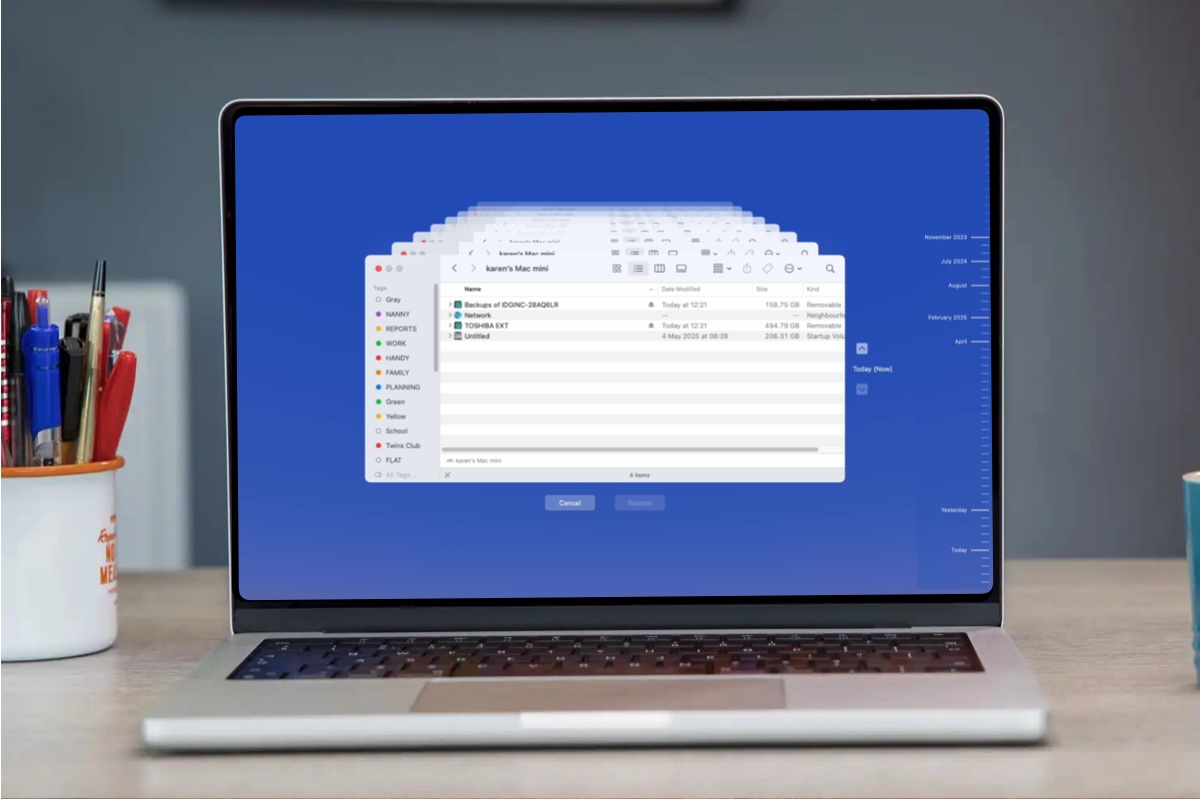
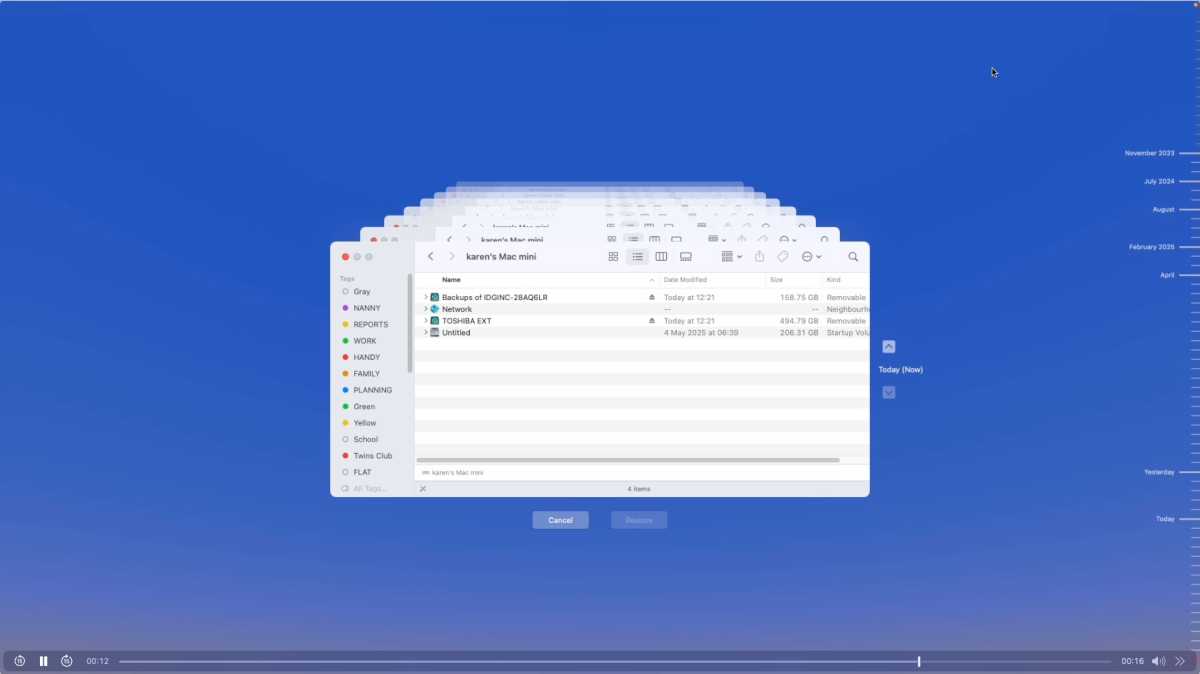
How to restore files from Time Machine
There are two approaches to this, the first being to restore individual files as needed from Time Machine and the second being to restore an entire volume from Time Machine, which is what you would do if you wanted to set up a new Mac using your Time Machine backup.
To restore individual files from Time Machine, use the following steps:
- Open Finder > click the Time Machine icon > Enter Time Machine.
- Navigate through the timeline to find the desired version of a document.
- Select the item and click Restore. You can optionally browse backups on other disks via the menu while holding the Option button.
To restore your Mac from Time Machine:
- Boot into macOS Recovery (on an M-series Mac press and hold the Power Button until you see the startup options and click Options and then Continue. On older Macs, restart your Mac while pressing Option, Command and R)
- Choose Restore from Time Machine Backup.
- Select the backup disk and follow the prompts to restore the entire system onto either the current or a new Mac using the Migration Assistant program. You can select specific users and files to move over to either your current or new Mac.
- Once this process has started, sit back, let the Mac do its work, wherein it’s indexing everything and putting the files where they need to be, don’t interrupt the process, and give the restoration time to complete.
How to force a Time Machine backup
Time Machine will make hourly backups but you can force it to make a backup at any time, perhaps because you are about to shut down your Mac and you want to make sure that the Time Machine backup is up to date first.
The quickest way to do this is:
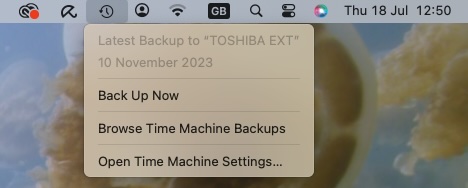
- Click on the Time Machine icon in the menu bar at the top of the screen.
- Choose Back Up Now.
Foundry
Alternatively:
- Open System Settings.
- Click on General.
- Scroll down to Time Machine.
- Click on Back Up Now.
How to speed up Time Machine backups
The first time you back up using Time Machine, expect it to take some time. Time Machine copies nearly all of the data on your Mac. At least you can keep using your Mac while Time Machine works in the background to back up your data.
If you recently upgraded macOS that could also cause Time Machine to take longer to complete a backup.
It might also take a while to back up your Mac with Time Machine if your previous backup was interrupted, or if a lot of files have changed, perhaps because the backup device hasn’t been plugged in for some time.
In these cases you could exclude some items from the backup so there isn’t as much data to back up. Follow these steps:
- Open Time Machine settings by clicking on the Time Machine icon in the menu at the top of the screen and clicking on Open Time Machine Settings, or go to System Settings > General > Time Machine.
- Click on Options.
- Below Exclude from Backups click on the +.
- Go to your Home folder (if don’t automatically see it in the right-hand column in the Finder, press Command + Shift + H to open it).
- If there are folders here you would happily leave out of the backup you can select them and click on Exclude.

Foundry
There are other ways to speed up a backup. If you are backing up over a network to a server, or to a network-attached storage device (NAS), it might be faster if you move your Mac to the same room as your router, or connect the storage device to your Mac, or the Mac to your router via an Ethernet cable. This should speed up your network.
If you’re using virtualization software to run other operating systems on your Mac, there might be large disk images including data related to those other operating systems on your Mac. You might only have changed a few files on in other OS, but Time Machine could back up the whole disk image. For this reason, you might want to tell Time Machine to exclude these files when it backs up.
Another thing that can interfere with your backups is antivirus software. You might want to exclude your backup drive from the virus scan.
If things are still slow, make sure your software is up to date, restart your Mac, and, if you are backing up over a network, restart your router.
What to do if Time Machine failed due to lack of space
If Time Machine is unable to complete the backup because there is insufficient space there are a few things you can do.
You could choose to exclude items from your backup. Follow these steps:
- Click the Time Machine icon in your menu and choose Time Machine preferences (or open Time Machine from System Settings).
- Click on Options.
- Click on + and locate any files and folders you want to leave out of the backup. If you have iTunes Match, for example, you could choose not to back up your music library because it will already be backed up in Apple’s iCloud.
- Alternatively, you could delete old backups from your storage device, although Time Machine should do this itself as time progresses. Open the storage drive in your Finder and locate the backup files in the Backups.backupdb folder. Find some of the older files and delete (you’ll also have to remove them from the trash).
We have a separate article on What to do when Time Machine backup is full here.
FAQ
How long will a Time Machine backup take?
Wondering how long the Time Machine backup will take? This can vary widely.
It’s likely that if you’ve only made a few changes since the last backup this one won’t take very long: just a few minutes.
If you haven’t backed up for a while, or if this is your first backup, it’s going to take some time. If it’s been a few months since you last backed up you will have to wait while Time Machine searches your Mac for changes before it can determine how long the backup will take, so if it’s been a while expect this to take a long time. Eventually, it will finish Calculating time remaining and you will see how long it will take.
How often should you back up a Mac?
You should back up your Mac regularly. The beauty of Time Machine is that it will back up constantly, but rather than make a complete backup of your Mac every time, the software only copies the things you are working on, so each backup is small and you will hardly notice it happening.
Most other backup methods involve a daily backup of your whole system. The benefit of Apple’s method is that you can load up a version of a document you were working on an hour ago, rather than undoing over and over again until you get back to that version.
The important thing is to remember that while Time Machine backs up regularly, it will only do so if your Mac is connected to the device you are backing up to. This could be an external storage device that needs to be plugged into your Mac, so don’t forget to plug it in! Speaking of which, your Mac also needs to be plugged in before it will back up to Time Machine, it won’t do so when running on battery power.
Alternatively, you could use a network attached storage device (a NAS drive) in which case, your Mac should only need to be connected to the same WiFi network to back up.
If your Mac hasn’t backed up using Time Machine for a while you will see alerts reminding you to back up. Don’t wait until a hundred days have passed since your last Time Machine backup and then spill water over your laptop (we say this from experience).
How to stop a Time Machine backup
If you don’t have the necessary time to leave your Mac switched on, or if the backup is causing your Mac to slow down while you are working on something important, you can choose to Skip This Backup.
Just click on the Time Machine icon in the menu at the top of the screen and click on Skip This Backup.
How to stop Time Machine backing up automatically
If you want to stop Time Machine backing up your Mac you could just unplug the external storage you are using for Time Machine backups, but the problem with that is you could end up going for months without updating.
A better solution is to disable hourly backups if they become annoying. Instead of hourly backups, you can choose to back up every day or every week.
Remember that the less regular the backups the longer it will take because the system won’t be making the incremental hourly backups so there will be more new content to copy.
Does Time Machine back up everything on your Mac?
Yes, but there are some exclusions you can set up, and it won’t capture all of your iCloud data.
Time Machine backs up what is on you Mac, including all your applications, system files, preferences, documents, photos, music, and so on.
You don’t have to back up everything. You can go into Time Machine’s options and manually exclude items such as folders, external volumes, and anything else you don’t want or need backed up.
It’s important to remember that not all of your iCloud data will be backed up, and only locally stored iCloud-synced files will be backed up; the rest will stay in the cloud.
Can Time Machine back up to iCloud?
Speaking of iCloud, you are probably wondering if you can back your Mac up to iCloud, in the same way as you can backup an iPhone or iPad to iCloud.
You’re not going to love this answer. Time Machine can’t back up directly to iCloud. It only supports backups to external or networked drives that have been written as APFS or Mac OS Extended (Journaled) formats.
The only way to “back up” to iCloud is by copying files on to the iCloud Drive. This way you could back up a wide variety of data such as pictures, music, email, messages, passwords, notes, and so on.
There are cloud-based service that will back up your Mac though. Take a look at our round up of the best cloud backup services for Mac, including our top choices Google Drive, Box, pCloud and IDrive.
Can I back up multiple Macs to the same Time Machine drive?
If you have more than one Mac you don’t need more than one external drive for your backups. You can backup more than one Mac to your Time Machine drive. You’ll need an external drive big enough to accommodate all the backups though–it’s recommended that you add up the space currently used by all your Macs and multiply that by 1.2 for the absolute minimum you will need.
All you need to do is plug your Time Machine backup drive into the other Mac. That Mac will start recording its own backups to a separate folder on that drive.
If you don’t fancy plugging and unplugging the drive all the time you can back up over the network you could set up a network attached storage device, or you could use Personal File Sharing and connect both Macs via the network, just be aware that this might be slower than doing so via a wired connection.
What to do if Time Machine can’t complete the backup
There are a few scenarios when Time Machine might fail to back up your Mac and when this happens the Time Machine icon in the menu bar will have an exclamation mark in the middle of it.
It could be because the external drive doesn’t have enough space; it might have become corrupted because you unplugged the drive without dismounting it first (this is why it’s important to make sure you always eject a drive properly before disconnecting it); or it could be that the drive isn’t formatted correctly.
To check if the problem is with the device you are backing up to, you could try the following:
If you back up to a server, hold down the Option/Alt key on your keyboard while clicking the Time Machine icon in the menu bar, then choose Verify Backups. If Time Machine finds an issue with your backup, it will display a message with details. Follow the onscreen instructions.
If you back up to an external drive, check that there isn’t a problem with the drive you are backing up to. First open Time Machine preferences and turn Time Machine off by deselecting Back Up Automatically, then open Disk Utility (press Command + Space bar and search for Disk Utility), select the backup device, and use First Aid to check the external backup drive.
If you find that the drive isn’t formatted properly use Disk Utility to reformat the disk. If you have to reformat you will lose what’s on the drive, so make a copy first or find another drive and use that.
What sort of drive do I need for Time Machine?
Over the course of almost 23 years of tech consulting, I’ve heard it asked time and time again if I needed a specific Apple or Mac drive to hook up to a Mac for Time Machine to work, and if the price would be far more expensive than a PC drive.
Nothing could be further from the truth, and you can always buy a generic hard drive from Amazon, Best Buy, Micro Center, Walmart, or your favorite store, connect it to your Mac, have it recognize the drive, and it’ll ask if you’d like to set the drive up as a Time Machine backup drive.
From there, let your Mac do its thing, set the drive up, perform the lengthy initial backup, and you’re good to go. As for specific external hard drives, read reviews, talk to your friends, and remember that if something is suspiciously cheap, there’s a reason for it. I’ve always liked Seagate, Western Digital, and G-Drives as well as Samsung’s and Toshiba’s units.
We have a round-up of the best hard drives for Mac, and the best SSDs for Mac, and the best NAS drives for Mac, so you are spoiled for choice.
In conclusion, there’s no time like the present to set up a Time Machine system, as your data isn’t going to back itself up. We’ve also reached a point in technology and history where multi-terabyte drives are high quality, they’re cheaper than ever, and odds are you can land something that’s outstanding and reliable for under $80 if you look around online.
You may love or hate Apple at any given moment of the day, but Time Machine is something the company did absolutely right. Set it up, assign a drive to it, keep your drive connected to it, let it back up your data, and you’ll have one less thing to worry about.